


Discord bots help you interact with members of a server as well as moderate the server. A discord bot can send messages on the server, message a user directly (DM), ban a user, promote and demote a user and so much more.
As a server owner, you are not always going to be present to monitor your server, but a bot can, and it does it way faster.
You may not be a server owner, but if you want to create a bot for a server you belong to or maybe for public use (available for other servers) this article will help you do that.
Before we jump right into code, let's see how Discord bots work.
Prerequisites
Before you get started, you will need the following:
- Node.js installed on your development machine.
- Any text editor of your choice, such as Visual Studio Code, Atom, Sublime, or nano.
- A free Discord account with a verified email account and a free Discord server you will use to test your Discord bot.
Step 1 — Setting Up a Discord Bot
In this step, you’ll use the Discord developer's graphical user interface (GUI) to set up a Discord bot and get the bot’s token, which you will pass into your program.
In order to register a bot on the Discord platform, use the Discord application dashboard. Here developers can create Discord applications including Discord bots.
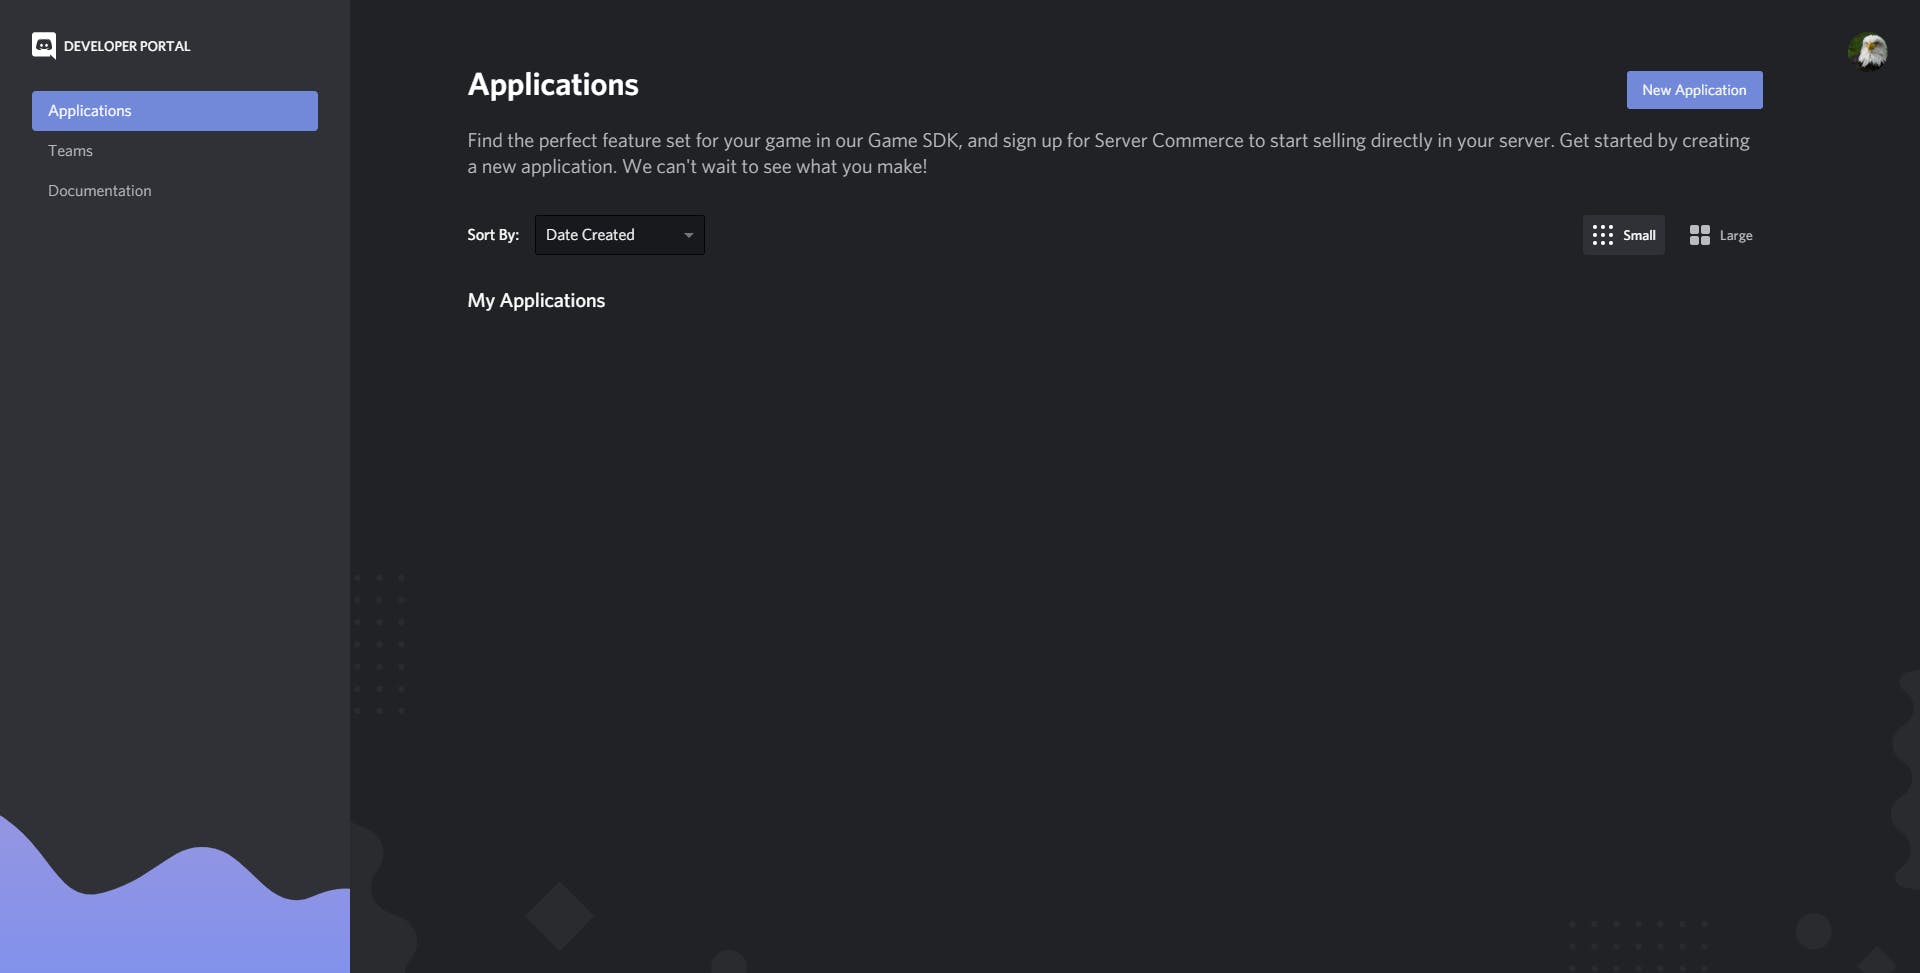
To get started, click New Application. Discord will ask you to enter a name for your new application. Then click Create to create the application.
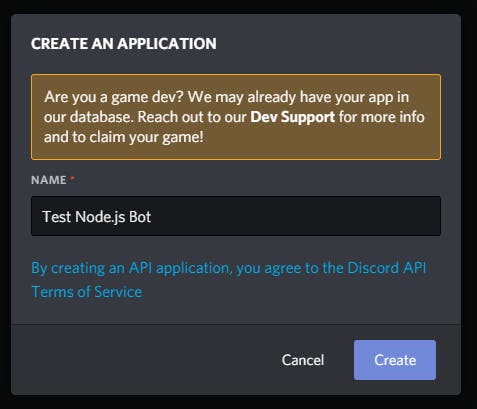
Note: The name for your application is independent from the name of the bot, and the bot doesn’t have to have the same name as the application.
Now open up your application dashboard. To add a bot to the application, navigate to the Bot tab on the navigation bar to the left.
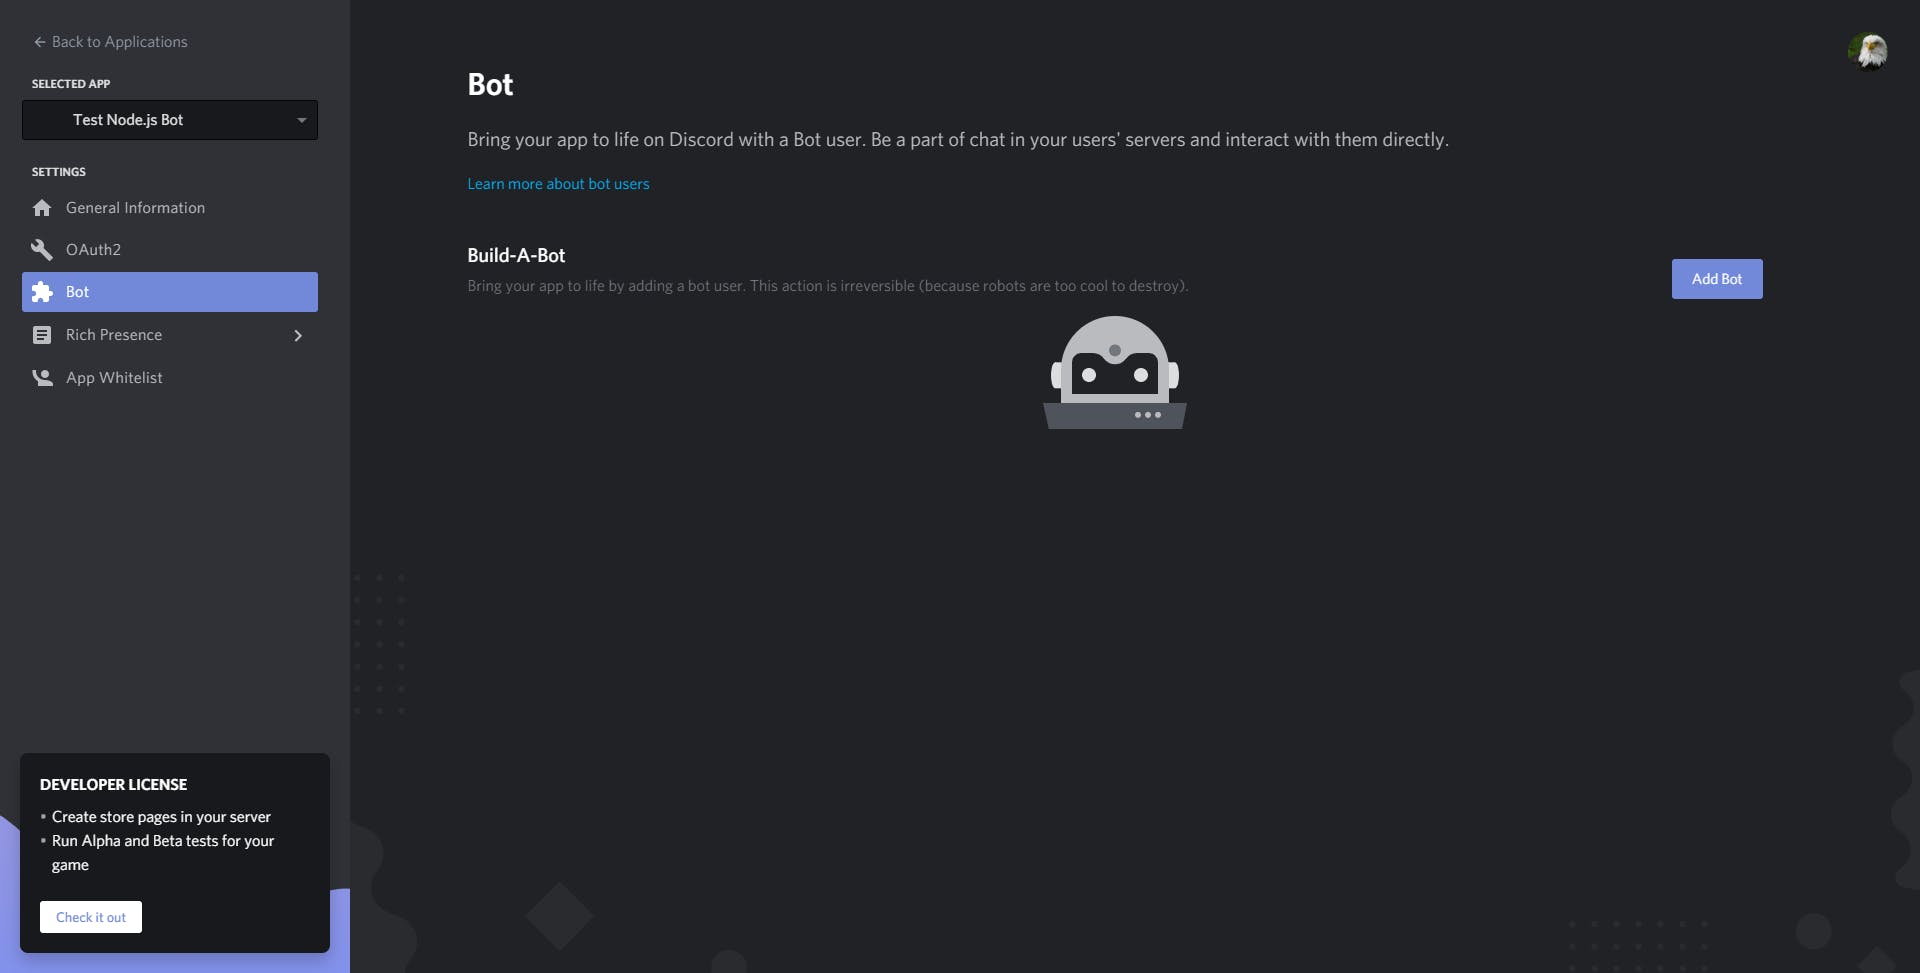
Click the Add Bot button to add a bot to the application. Click the Yes, do it! button when it prompts you for confirmation. You will then be on a dashboard containing details of your bot’s name, authentication token, and profile picture.
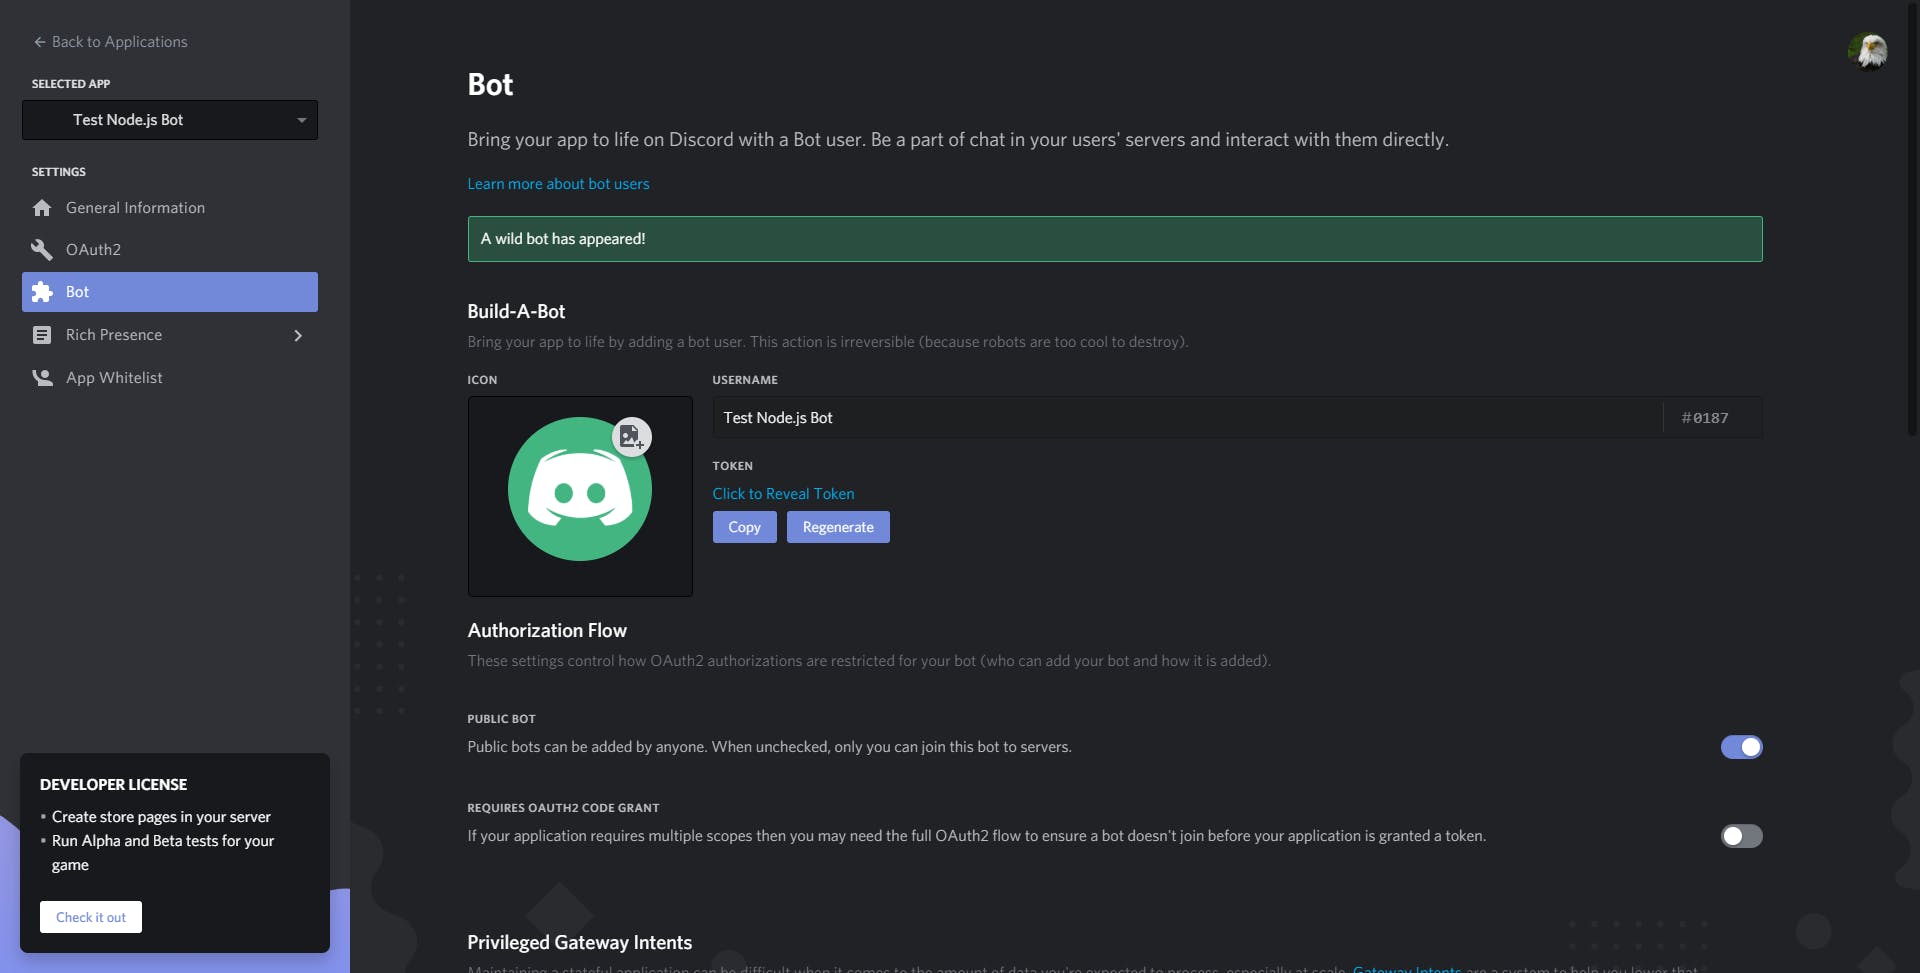
You can modify your bot’s name or profile picture here on the dashboard. You also need to copy the bot’s authentication token by clicking Click to Reveal Token and copying the token that appears.
Warning: Never share or upload your bot token as it allows anyone to log in to your bot.
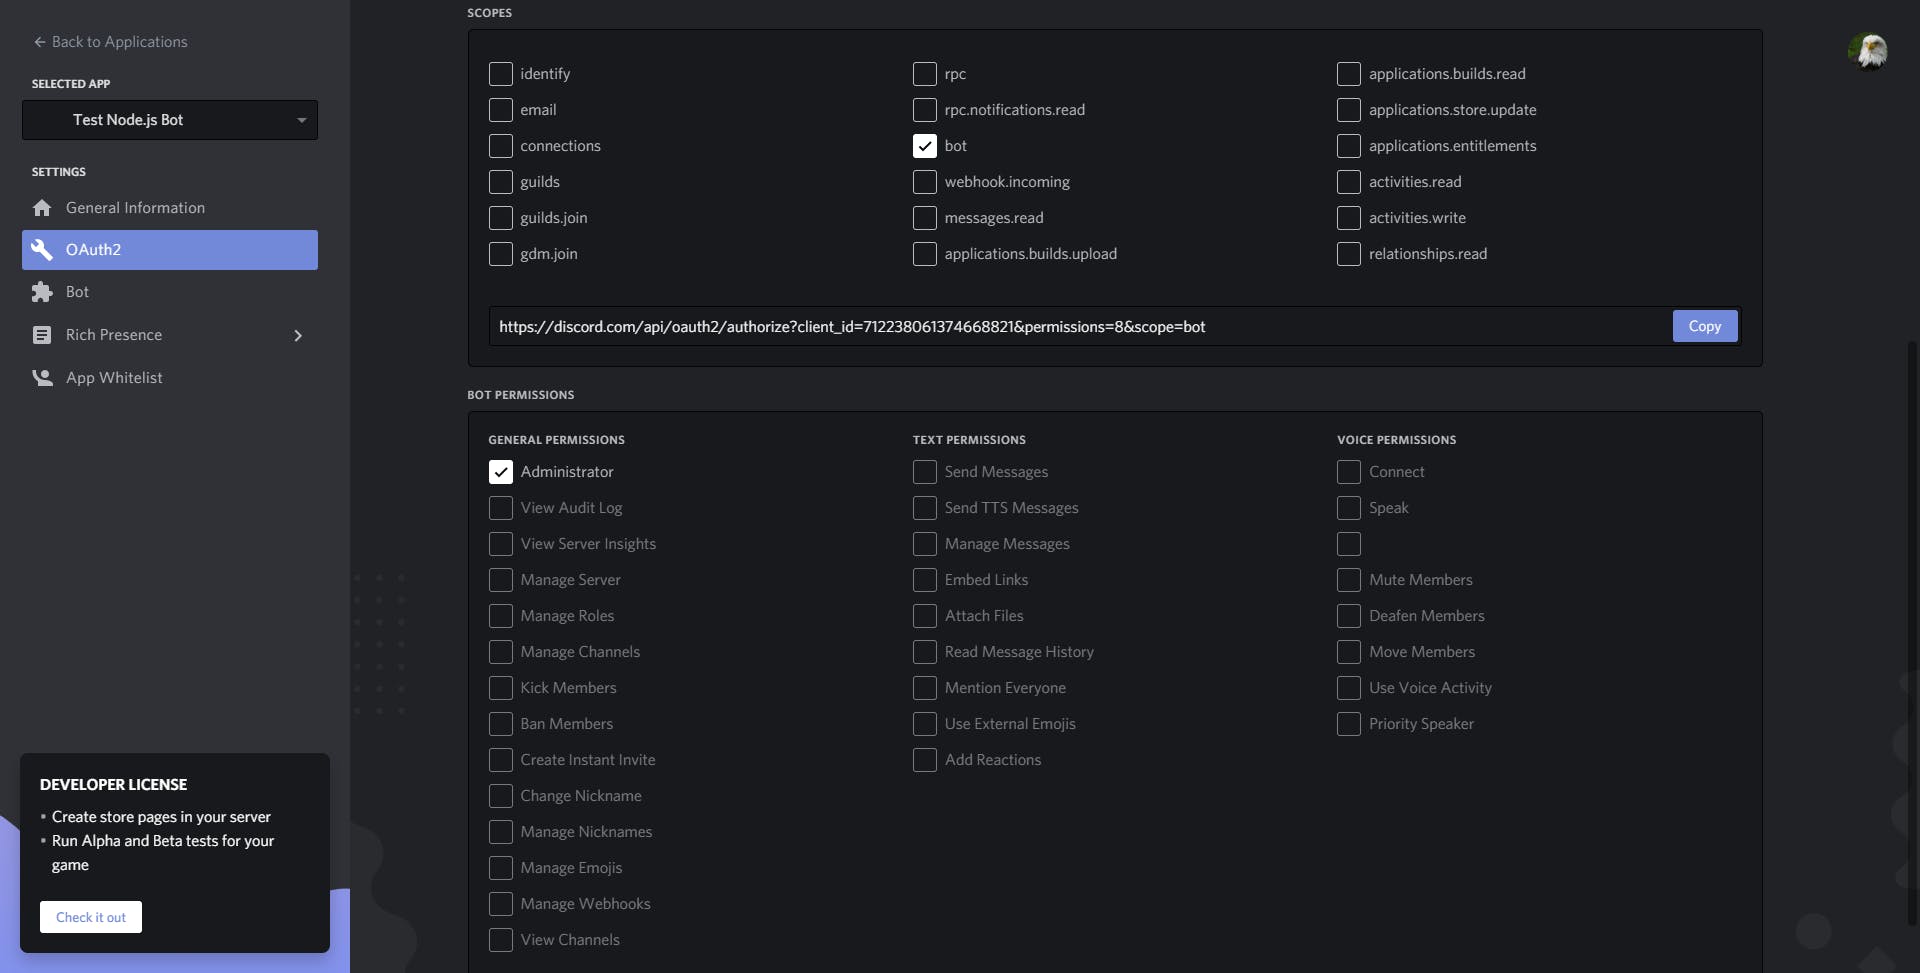
Now you need to create an invite to add the bot to a Discord guild where you can test it. First, navigate to the URL Generator page under the OAuth2 tab of the application dashboard. To create an invite, scroll down and select bot under scopes. You must also set permissions to control what actions your bot can perform in guilds. For the purposes of this tutorial, select Administrator, which will give your bot permission to perform nearly all actions in guilds. Copy the link with the Copy button.
Next, add the bot to a server. Follow the invite link you just created. You can add the bot to any server you own, or have administrator permissions in, from the drop-down menu.
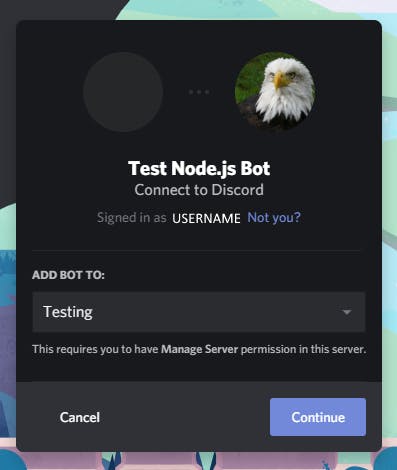
Now click Continue. Ensure you have the tickbox next to Administrator ticked—this will grant the bot administrator permissions. Then click Authorize. Discord will ask you to solve a CAPTCHA before the bot joins the server. You’ll now have the Discord bot on the members list in the server you added the bot to under offline.
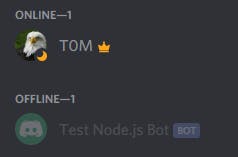
You’ve successfully created a Discord bot and added it to a server. Next, you will write a program to log in to the bot.
Step 2 — Creating Your Project
In this step, you’ll set up the basic coding environment where you will build your bot and log in to the bot programmatically.
First, you need to set up a project folder and necessary project files for the bot.
Create your project folder:
mkdir discord-bot
Move into the project folder you just created:
cd discord-bot
Next, create a file named config.json to store your bot’s authentication token.
Then add the following code to the config file, replacing the highlighted text with your bot’s authentication token:
{
    "BOT_TOKEN": "YOUR BOT TOKEN"
}
Save and exit the file.
Next you’ll create a package.json file, which will store details of your project and information about the dependencies you’ll use for the project. You’ll create a package.json file by running the following npm command:
npm init
You’ll now install the discord.js package that you will use to interact with the Discord API. You can install discord.js through npm with the following command:
npm install discord.js
Now that you’ve set up the configuration file and installed the necessary dependency, you’re ready to begin building your bot. In a real-world application, a large bot would be split across many files, but for the purposes of this tutorial, the code for your bot will be in one file.
First, create a file named index.js in the discord-bot folder for the code.
Begin coding the bot by requiring the discord.js dependency and the config file with the bot’s token:
const Discord = require("discord.js");
const config = require("./config.json");
Following this, add the next two lines of code:
const client = new Discord.Client({intents: ["GUILDS", "GUILD_MESSAGES"]});

client.login(config.BOT_TOKEN);
Save and exit your file.
The first line of code creates a new Discord.Client and assigns it to the constant client. This client is partly how you will interact with the Discord API and how Discord will notify you of events such as new messages. The client, in effect, represents the Discord bot. The object passed into the Client constructor specifies the gateway intents of your bot. This defines which WebSocket events your bot will listen to. Here you have specified GUILDS and GUILD_MESSAGES to enable the bot to receive message events in guilds.
The second line of code uses the login method on the client to log in to the Discord bot you created, using the token in the config.json file as a password. The token lets the Discord API know which bot the program is for and that you’re authenticated to use the bot.
Now, execute the index.js file using Node:
node index.js
Your bot’s status will change to online in the Discord server you added it to.
You’ve successfully set up a coding environment and created the basic code for logging in to a Discord bot. In the next step, you’ll handle user commands and get your bot to perform actions, such as sending messages.
Step 3 — Handling Your First User Command
In this step, you will create a bot that can handle user commands. You will implement your first command ping, which will respond with "pong" and the time taken to respond to the command.
First, you need to detect and receive any messages users send so you can process any commands. Using the on method on the Discord client, Discord will send you a notification about new events. The on method takes two arguments: the name of an event to wait for and a function to run every time that event occurs. With this method you can wait for the event message—this will occur every time a message is sent to a guild where the bot has permission to view messages. Therefore you will create a function that runs every time a message is sent to process commands.
First, open your index.js.
Add the following code to your file:
client.on("messageCreate", function(message) {

});
This function, which runs on the messageCreate event, takes message as a parameter. message will have the value of a Discord.js message instance, which contains information about the sent message and methods to help the bot respond.
Now add the following line of code to your command-handling function:
client.on("messageCreate", function(message) {
  if (message.author.bot) return;
});
This line checks if the author of the message is a bot, and if so, stops processing the command. This is important as generally you don’t want to process, or respond to, bots’ messages. Bots usually don’t need to use information from other bots, so ignoring their messages saves processing power and helps prevent accidental replies.
Now you’ll write a command handler. To accomplish this, it’s good to understand the usual format of a Discord command. Typically, the structure of a Discord command contains three parts in the following order: a prefix, a command name, and (sometimes) command arguments.
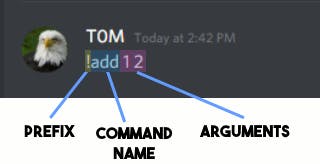
- Prefix: the prefix can be anything, but is typically a piece of punctuation or abstract phrase that wouldn’t normally be at the start of a message. This means that when you include the prefix at the start of the message, the bot will know that the intention for this command is for a bot to process it.
- Command name: The name of the command the user wants to use. This means the bot can support multiple commands with different functionality and allow users to choose between them by supplying a different command name.
Arguments: Sometimes if the command requires or uses extra information from the user, the user can supply arguments after the command name, with each argument separated by a space.
Note: There is no enforced command structure and bots can process commands how they like, but the structure presented here is an efficient structure that the vast majority of bots use.*
To begin creating a command parser that handles this format, add the following lines of code to the message handling function:
const prefix = "!";

client.on("messageCreate", function(message) {
  if (message.author.bot) return;
  if (!message.content.startsWith(prefix)) return;
});
You add the first line of code to assign the value "!"to the constant prefix, which you will use as the bot’s prefix.
The second line of code you add checks if the content of the message the bot is processing begins with the prefix you set, and if it doesn’t, stops the message from continuing to process.
Now you must convert the rest of the message into a command name and any arguments that may exist in the message. Add the following highlighted lines:
client.on("messageCreate", function(message) {
  if (message.author.bot) return;
  if (!message.content.startsWith(prefix)) return;

  const commandBody = message.content.slice(prefix.length);
  const args = commandBody.split(' ');
  const command = args.shift().toLowerCase();
});
You use the first line here to remove the prefix from the message content and assign the result to the constant commandBody. This is necessary as you don’t want to include the prefix in the parsed command name.
The second line takes the message with the removed prefix and uses the split method on it, with a space as the separator. This splits it into an array of sub-strings, making a split wherever there is a space. This results in an array containing the command name, then, if included in the message, any arguments. You assign this array to the constant args.
The third line removes the first element from the args array (which will be the command name provided), converts it to lowercase, and then assigns it to the constant command. This allows you to isolate the command name and leave only arguments in the array. You also use the method toLowerCase as commands are typically case insensitive in Discord bots.
You’ve completed building a command parser, implementing a required prefix, and getting the command name and any arguments from messages. You will now implement and create the code for the specific commands.
Add the following code to start implementing the ping command:
  const args = commandBody.split(' ');
  const command = args.shift().toLowerCase();

  if (command === "ping") {

  }
});
This if statement checks if the command name you parsed (assigned to the constant command) matches "ping". If it does, that indicates the user wants to use the "ping" command. You will nest the code for the specific command inside the if statement block. You will repeat this pattern for other commands you want to implement.
Now, you can implement the code for the "ping"command:
if (command === "ping") {
const timeTaken = Date.now() - message.createdTimestamp;
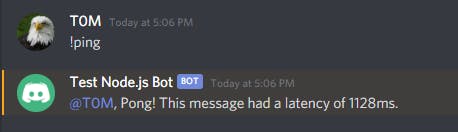
message.reply(`Pong! This message had a latency of ${timeTaken}ms.`);
}
Save and exit your file.
You add the "ping" command block that calculates the difference between the current time—found using the now method on the Date object—and the timestamp when the message was created in milliseconds. This calculates how long the message took to process and the "ping" of the bot.
The second line responds to the user’s command using the reply method on the message constant. The reply method pings (which notifies the user and highlights the message for the specified user) the user who invoked the command, followed by the content provided as the first argument to the method. You provide a template literal containing a message and the calculated ping as the response that the reply method will use.
This concludes implementing the "ping" command.
Run your bot using the following command (in the same folder as index.js):
node index.js
You can now use the command "!ping" in any channel the bot can view and message in, resulting in a response.
You have successfully created a bot that can handle user commands and you have implemented your first command. In the next step, you will continue developing your bot by implementing a sum command.
Step 4 — Implementing the Sum Command
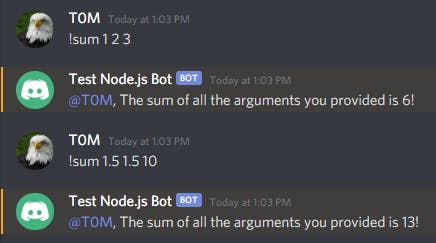
Now you will extend your program by implementing the "!sum" command. The command will take any number of arguments and add them together, before returning the sum of all the arguments to the user.
If your Discord bot is still running, you can stop its process with CTRL + C.
Open your index.js file again.
To begin implementing the "!sum" command you will use an else-if block. After checking for the ping command name, it will check if the command name is equal to "sum". You will use an else-if block since only one command will process at a time, so if the program matches the command name "ping", it doesn’t have to check for the "sum" command. Add the following highlighted lines to your file:
  if (command === "ping") {
    const timeTaken = Date.now() - message.createdTimestamp;
    message.reply(`Ping! This message had a latency of ${timeTaken}ms.`);
  }

  else if (command === "sum") {

  }
});
You can begin implementing the code for the "sum" command. The code for the "sum" command will go inside the else-if block you just created. Now, add the following code:
  else if (command === "sum") {
    const numArgs = args.map(x => parseFloat(x));
    const sum = numArgs.reduce((counter, x) => counter += x);
    message.reply(`The sum of all the arguments you provided is ${sum}!`);
  }
You use the map method on the arguments list to create a new list by using the parseFloat function on each item in the args array. This creates a new array (assigned to the constant numArgs) in which all of the items are numbers instead of strings. This means later you can successfully find the sum of the numbers by adding them together.
The second line uses the reduce method on the constant numArgs providing a function that totals all the elements in the list. You assign the sum of all the elements in numArgs to the constant sum.
You then use the reply method on the message object to reply to the user’s command with a template literal, which contains the sum of all the arguments the user sends to the bot.
This concludes implementing the "sum" command. Now run the bot using the following command (in the same folder as index.js):
node index.js
You can now use the "!sum" command in any channel the bot can view and message in.
The following is a completed version of the index.js bot script:
const Discord = require("discord.js");
const config = require("./config.json");

const client = new Discord.Client({intents: ["GUILDS", "GUILD_MESSAGES"]});

const prefix = "!";

client.on("messageCreate", function(message) {
  if (message.author.bot) return;
  if (!message.content.startsWith(prefix)) return;

  const commandBody = message.content.slice(prefix.length);
  const args = commandBody.split(' ');
  const command = args.shift().toLowerCase();

  if (command === "ping") {
    const timeTaken = Date.now() - message.createdTimestamp;
    message.reply(`Pong! This message had a latency of ${timeTaken}ms.`);
  }

  else if (command === "sum") {
    const numArgs = args.map(x => parseFloat(x));
    const sum = numArgs.reduce((counter, x) => counter += x);
    message.reply(`The sum of all the arguments you provided is ${sum}!`);
  }
});

client.login(config.BOT_TOKEN);
In this step, you have further developed your Discord bot by implementing the sumcommand.
You have successfully implemented a Discord bot that can handle multiple, different user commands and command arguments. If you want to expand on your bot, you could possibly implement more commands or try out more parts of the Discord API to craft a powerful Discord bot. You can review the Discord.js documentation or the Discord API documentation to expand your knowledge of the Discord API. In particular, you could convert your bot commands to slash commands, which is a best practice for Discord.js v13.
Hope you all enjoyed this article and were able to make your very own Discord bot! If you have any doubts or questions, make sure to write them in the comments below. Also, please add a reaction to this article and rate it out of 10. I appreciate it 🙏
Don’t forget to join my Discord server!
#Have a Great Day! Thank you! Happy Coding! 💻⚡